An auto clicker is the tool you need if you’ve ever hoped your computer would handle those incessant clicks for you. An auto clicker saves time and effort by precisely automating mouse clicks, whether you’re testing software, playing games, or completing tedious paperwork. Even if you’re not extremely tech-savvy, it’s easy to learn how to activate an auto clicker on your computer. In this quick-start guide, we’ll cover the basics, so you can set it up in minutes and start enjoying smoother, faster, and hassle-free clicking.
Quick Start Guide to Turn On Auto Clicker
Follow this simple guide to perform your first automated clicking task. We’ll start with the most basic setup and gradually introduce more features.
Method 1: Instant Auto Clicking (Beginner)
- Launch the Application: You need to double-click the executable file
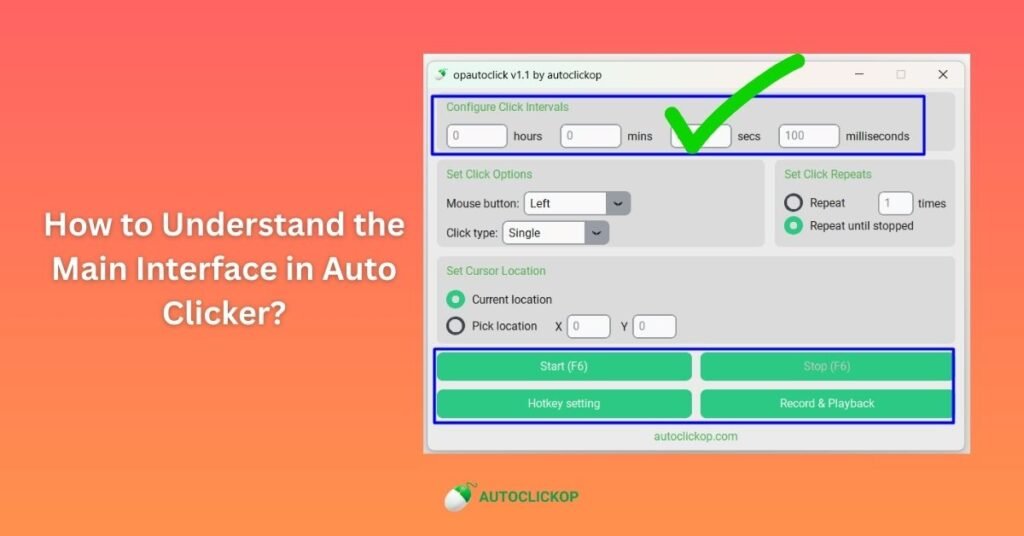
- Set Timing: In the “milliseconds” field, enter “1000” (for 1-second intervals)
- Position Your Mouse: Move your cursor to where you want the clicks to occur
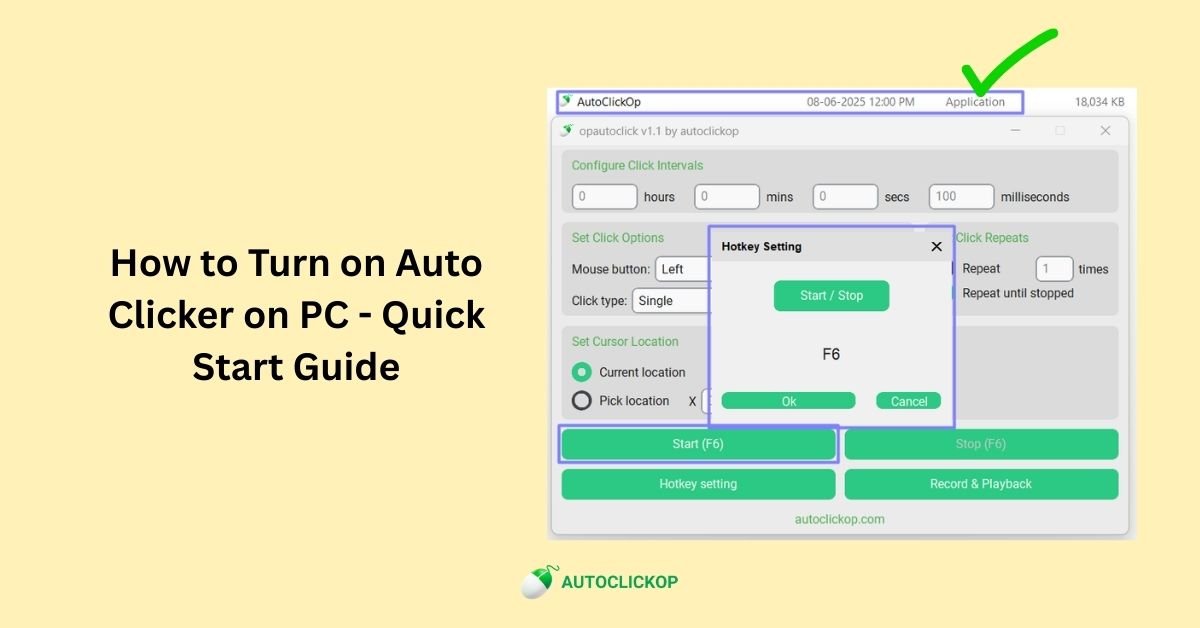
- Start Clicking: Press F6 or click the “Start” button
- Stop When Done: Press F6 again or click the “Stop” button
Success Check
You should see clicks happening every second at your cursor location. If it’s working, you’ve successfully set up basic auto clicking!
Method 2: Precise Coordinate Clicking (Intermediate)
Open the Application: You need to open the installed application
Set Precise Timing: Enter “500” in milliseconds (0.5-second intervals)
Choose Pick Location: Select the “Pick location” radio button
Enter Coordinates: Enter X: 100, Y: 100 (top-left area of screen)
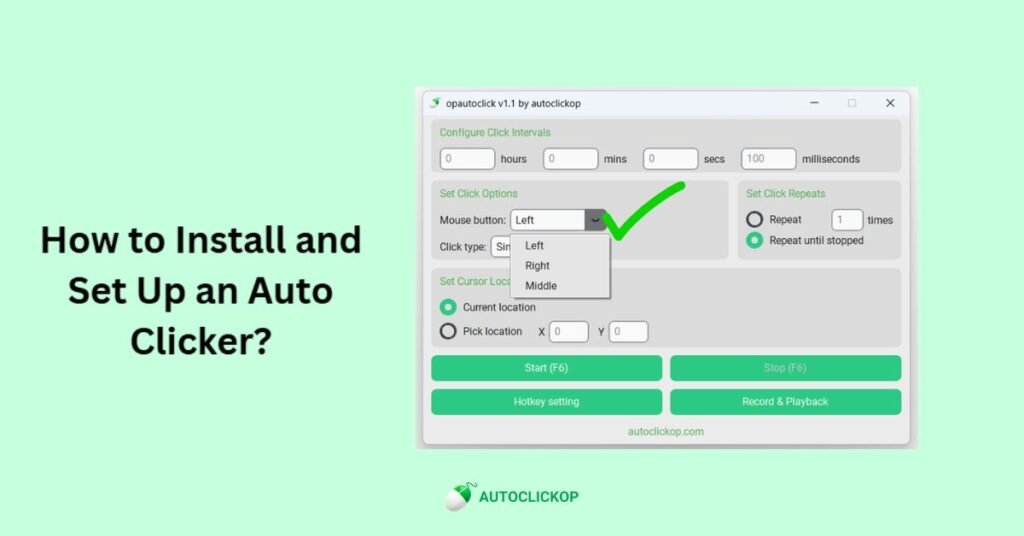
Configure Clicks: Ensure “Left” mouse button and “Single” click are selected
Start Automation: Press F6 to begin clicking at the exact coordinates
Common First-Use Examples
🎮 Gaming Auto Clicker
Interval: 200 milliseconds Mouse Button: Left Click Type: Single Position: Current location Repeat: Until stopped
Use: Rapid clicking for games (where permitted)
🖥️ Application Testing
Interval: 2 seconds Mouse Button: Left Click Type: Single Position: X=200, Y=150 Repeat: 10 times
Use: Testing UI responsiveness
📝 Form Automation
Interval: 3 seconds Mouse Button: Left Click Type: Single Position: Current location Repeat: Until stopped
Use: Navigating through web forms
Quick Troubleshooting and Tips
Problem: Quick Solution. Nothing happens when I press F6. Click the application window first, then try F6. Clicks are too fast. Increase the milliseconds value (try 1000 for 1 second). Clicks go to the wrong location. In “Current location” mode, position the mouse first. Can’t stop the clicking. Move the mouse to the top-left corner of the screen (emergency stop)
Important First-Use Tips
Start Slow: Begin with longer intervals (1+ seconds) until you’re comfortable
Test Area: Test on a safe area, like your desktop or a text editor, first
Emergency Stop: Remember that moving your mouse to the top-left corner stops everything
Save Work: Save any vital work before starting automation
Final Thoughts
It is easy to set up an auto clicker on your computer, and after you do, you’ll question how you ever got by without it. An auto clicker is a tiny device that has a tremendous impact on everything from decreasing repetitive strain to increasing productivity and improving gaming performance. Always use it sensibly and remember to modify the settings to meet your unique requirements. With this quick start guide, you now have everything you need to get started. So, go ahead and make your daily clicking tasks easier, faster, and completely automated.