Step 1: Download & First Launch
In actuality, there is no need for installation. This program is fully portable. No complicated installation procedure is required; download and run.
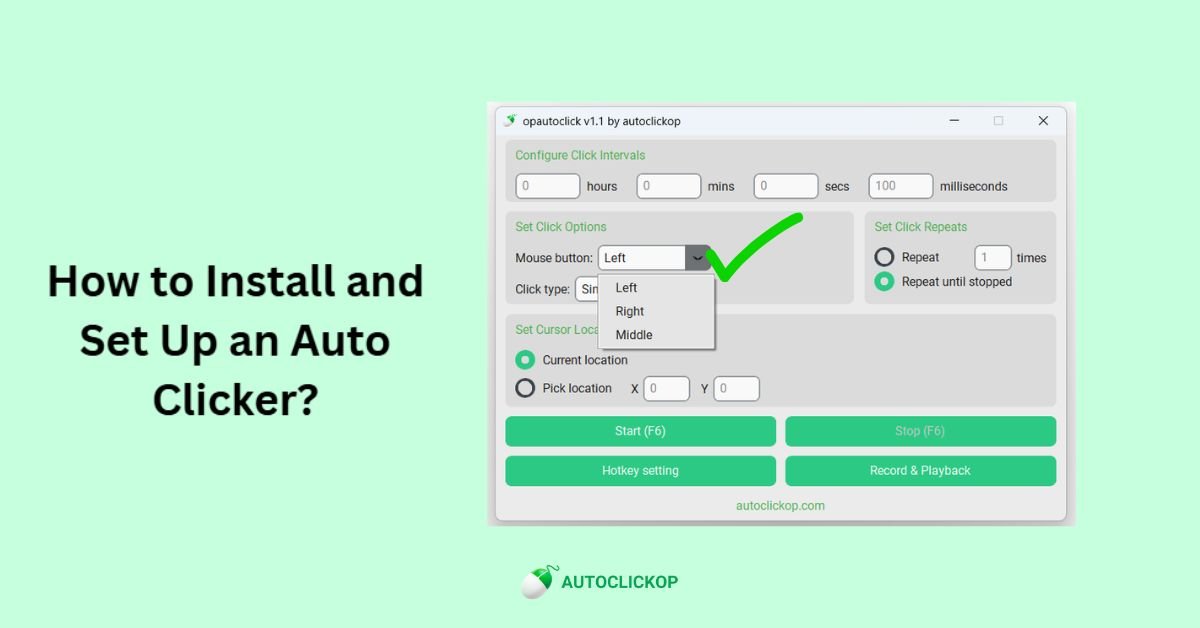
- Download: Get the executable file (.exe) for the application from your source. Save the location: Place the file in the designated folder, such as Documents or Desktop, according to your preference.
- Launch: Double-click the executable file to start the application
- Security Warning: If Windows shows a security warning, click “More info” then “Run anyway”
- Ready to Use: The application opens with default settings and is immediately ready for use
Step 2: First Launch Checklist
At the very first launch, the user needs to verify the following Items on first start:
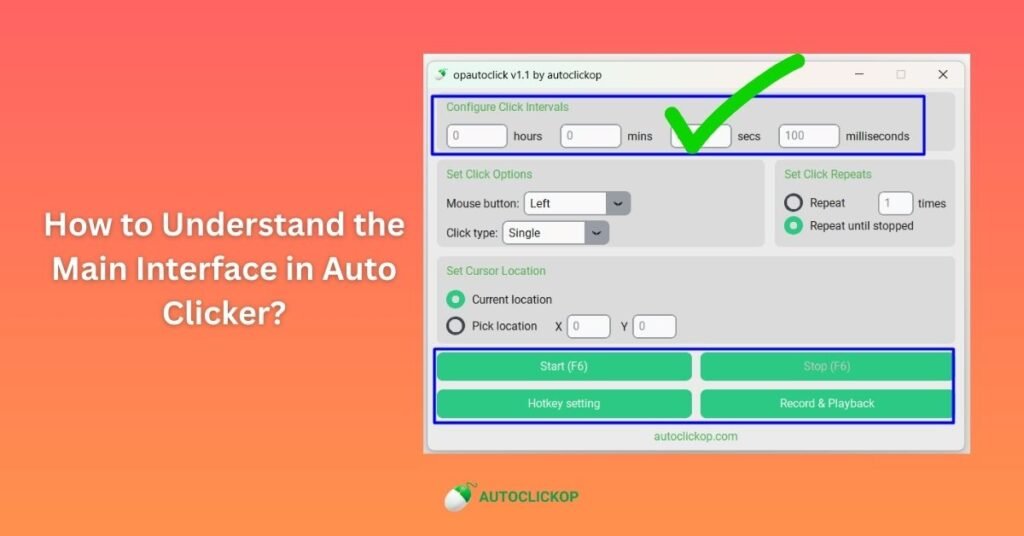
1. Test Basic Clicking
Testing basic clicking tasks is the first thing to do after installing the auto clicker. This ensures that the program is functioning correctly and responding to your instructions. Choose left mouse click as the default action and start by configuring a basic click interval, such as one click per second. Launch the application and observe its performance. Consistent clicks should occur without the need for human involvement. Ensure your settings are correct and up to date if you experience erratic or sluggish clicks. Before moving on to more complex customisation, testing at this point helps ensure that the auto clicker is operating as intended.
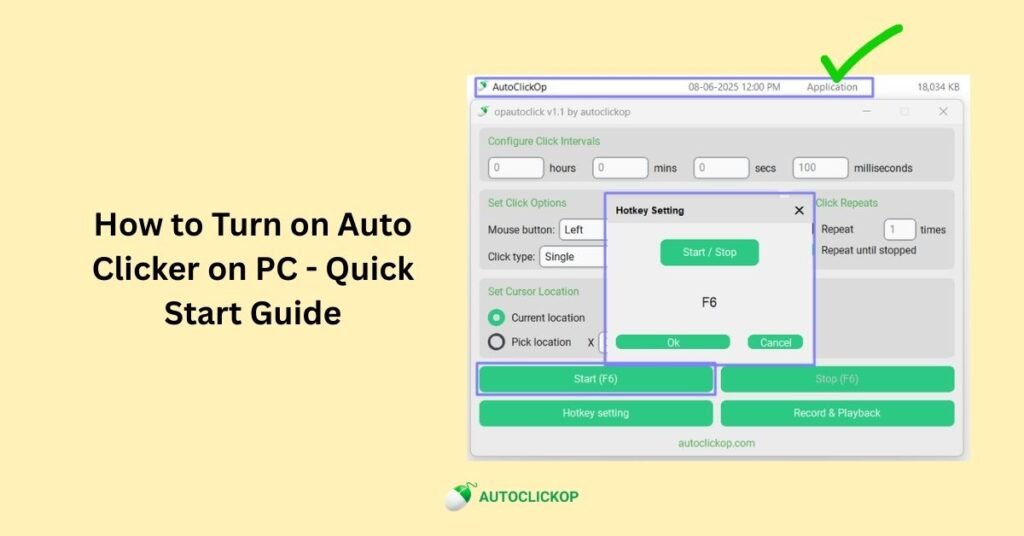
2. Check Hotkey (F6)
To operate an auto clicker without interfering with your job, hotkeys are necessary. The majority of auto clickers initiate and terminate clicking by pressing a default hotkey, like F6. Press F6 after setup to ensure the application responds immediately. When the hotkey is pressed, the auto clicker should start or stop working. Ensure the hotkey is assigned correctly and doesn’t interfere with any other applications if it fails to function. Smoother clicking is ensured by reliable hotkey testing, particularly when you need fast control for repetitive data entering, gaming, or testing.
3. Review Safety Features
Despite their apparent simplicity, safety features are essential for the proper use of auto clickers. Before using the auto clicker, check for options like click limits, time delays, and quick stop settings. These features are used to prevent the application from running endlessly or performing random tasks. For example, limiting the number of clicks helps protect your system from unnecessary strain. For emergencies, some auto-clickers also provide an exit shortcut or pause hotkey. You need to verify that these protections help prevent unintentional misuse and guarantee that you have total control over automation. Your auto clicker is safe and effective when it has a properly adjusted safety setting.
4. Test Positioning
Positioning determines where your auto clicker will execute clicks, and it’s vital to test this feature for accuracy. You can choose between fixed coordinates, where clicks always occur at a specific spot, or dynamic positioning, where clicks follow your cursor. Test both modes to confirm they behave as expected. For example, set a target button or menu option and see if the auto-clicker consistently clicks on the correct location. Incorrect positioning could lead to mistakes or wasted actions. Verifying positioning early ensures smoother automation and helps you confidently use the tool for repetitive tasks or gaming strategies.
Step 3: Security & Permissions
🔒 Required Permissions
Mouse control (for clicking automation)
Keyboard monitoring (for hotkey detection)
Screen coordinate access (for positioning)
🛡️ Privacy & Security
No internet connection required
No personal data collection
No background services installed
Completely portable application
Step 4: Antivirus Considerations
You might be unable to launch this application if you have antivirus software installed. Specific antivirus software is wary of automated tools. There is no actual risk here; this is just typical behavior. If your antivirus software prevents the application from running, follow the steps below.
Add the application to your antivirus allowlist/exclusions
Temporarily turn off real-time protection during download
Download from a trusted source
Scan the file if you have concerns about its authenticity
Step 5: Optimal Setup Recommendations
Dedicated Folder: The user needs to create a folder like “AutoClicker” to keep the application organized
Desktop Shortcut: Create a shortcut on your desktop for easy access
Administrator Mode: Right-click and “Run as administrator” for full functionality
Backup Copy: Keep a backup copy in case of file corruption
Documentation: Keep this guide in the same folder for easy reference
Final Thoughts
Installing and setting up an autoclicker is a quick and straightforward process, which can significantly improve efficiency, accuracy, and convenience. Whether you’re using it for gaming, repetitive tasks, or testing applications, the key is to choose a reliable tool and configure it properly to suit your needs. By adjusting the click interval, location, and hotkeys, you gain complete control over automation. Just remember to use it responsibly and only where it’s allowed. With the proper setup, an auto clicker can save valuable time and effort while boosting your overall productivity.